To plan weaving in the ends of a crochet blanket, count the tails still needing attention, set aside any that your pattern reserves for joining, and divide the rest into manageable batches. This turns a vague finishing task into a visible amount of work. It also helps you avoid calling a blanket finished while loose ends remain on the reverse.
Count tails, not colors
One color can create many ends if you cut and restart it repeatedly. A continuous strand carried through several sections has a different tail count. Count the actual loose tails when possible; the number of shades in the blanket is not enough to estimate finishing work.
For a planning example, suppose each of 24 squares uses three separate yarn segments, each started and fastened off independently. At two ends per segment, that is 24 × 3 × 2 = 144 ends. This assumes every segment has a starting and finishing tail and none has already been dealt with. It excludes later joins and borders.
Keep three small totals
- Ready to secure: tails that no longer have a construction job.
- Reserved: tails your pattern specifically leaves for joining or another step.
- Completed: tails already secured and checked.
Do not trim a reserved tail just to make the count smaller. Note its purpose on your project sheet. If the instructions do not explain a long tail, check that construction step before changing it.
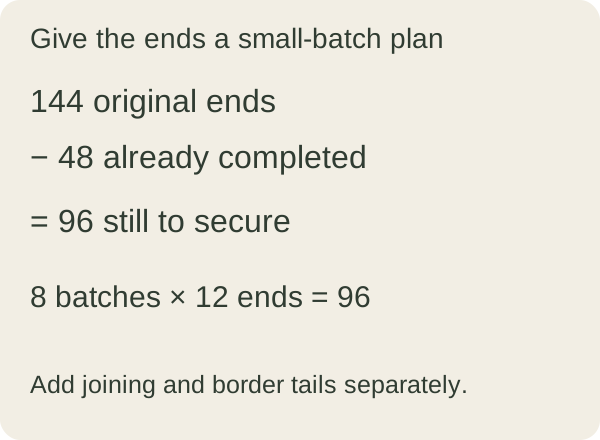
In that example, securing 48 of the original 144 ends leaves 96. Eight batches of twelve cover those remaining ends. Choose a smaller batch if you prefer; twelve is simply a convenient example, not a recommended endurance target.
Build a repeatable finishing check
The Red Heart weaving-in tutorial at Yarnspirations demonstrates passing a tail under several stitches and reversing direction. It recommends leaving at least four inches to work with, with extra length potentially useful for thick yarn. Its guidance also distinguishes crocheting over a tail from completing the weaving-in process.
Use the tutorial and your pattern to choose a method suited to the actual fabric. Check both sides as you work, especially when a contrasting tail might show. Do not mark an end completed merely because it is hidden from the front. Avoid pulling the fabric into a pucker, and inspect the section again before trimming.
If you are still making the squares, you can reserve a little finishing time between groups rather than leaving every ordinary tail to the final evening. Keep any tails required for construction clearly identified. A swatch gives you a place to practice the method without treating the gift itself as a trial.
Allow for new ends from joins and borders
The 144-end example covers the square segments only. Add the actual tails created when you join pieces, attach new yarn or work the border. A continuous join and separately worked seams will not necessarily create the same number, so avoid a blanket-wide formula that assumes one method.
Our joining-yarn estimate addresses yarn supply. Your tail list addresses the finishing work after that yarn is used. Keep both records if a gift deadline is approaching.
Estimate your own pace before setting a deadline
Complete one comfortable batch and record how long it took, including inspection. Use that observation as a planning aid, allowing for harder-to-reach or contrasting ends. The blanket completion-time guide helps combine this with joining, washing and other remaining work; there is no universal minutes-per-end promise.
When the list reaches zero, spread out the blanket and look over both sides and the edges once more. Keep identified spare yarn with your project notes. The calculator below can estimate the length of a leftover ball from its net weight and original label; it does not measure how securely an end has been woven.
Keep planning your blanket
Examples illustrate the arithmetic; they are not physical project tests. Send a correction.