A crochet blanket made in panels lets you work on narrower pieces and join them later. Before starting, plan the assembled size, not just each strip: panel widths, the effect of the joins and the outer border all contribute to the result. Make two small sample panels and join them before committing to a whole set.
Choose panels for the way you want to work
Panels may suit you if you want a smaller piece in your project bag, enjoy finishing sections, or like vertical bands of color. A single-piece blanket may suit you better if you prefer to avoid long seams. Panels move some of the work into assembly; they do not automatically make the blanket faster or use less yarn.
Start with a pattern designed for panels when you want complete construction instructions. Dividing an existing one-piece stitch pattern can require new edge stitches or a different repeat arrangement. This guide helps plan dimensions and layout; it does not supply those missing pattern instructions.
Measure what your join does to the width
Lion Brand's seaming overview describes both sewn joins and crochet joins, including methods that leave a visible ridge. Choose the join for the fabric and appearance you want, then measure its effect instead of assuming it adds a fixed gap.
Measure two prepared sample panels separately. Join them using the intended technique and measure the combined width without stretching. The combined measurement minus the two separate widths is the effective width change at that join. It can be positive, close to zero or negative if the assembly takes up width. Use measurements made in the same fabric state.
A four-panel width example
Suppose each of four panels measures 25 cm wide and 120 cm long. There are three lengthwise joins. In your hypothetical sample, joining two 25 cm panels gives 50.5 cm, so the effective addition is 0.5 cm per join. Four panels would then give an estimated assembled body width of 100 + 1.5 = 101.5 cm. A 4 cm outer border on each side brings the total width to 109.5 cm.
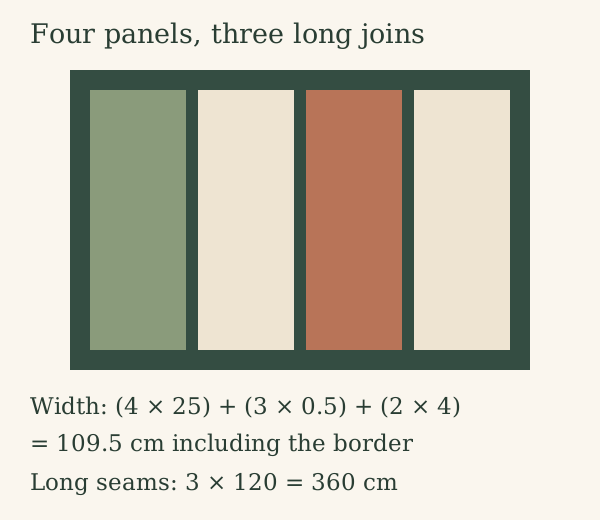
The same 4 cm border at the top and bottom gives 128 cm total length. These estimates assume the joining does not change the panel length. Check that assumption in your samples and again during assembly. For a target width of 110 cm with the same three joins and side borders, each equal panel would need to be (110 − 8 − 1.5) ÷ 4 = 25.125 cm before fitting the width to valid stitch repeats.
Use the stitch-repeat guide to choose a workable count, then recalculate the total with the resulting measured width. A neat decimal answer is not necessarily a valid pattern width.
Lay out color before making duplicate panels
Try a small paper sketch with one column for each panel. Four equal strips could alternate moss and cream, or place clay between two cream panels with moss at one edge. These are aesthetic options, not rules. If you want symmetry, check the whole arrangement: four panels can mirror as A–B–B–A, while A–B–A–B repeats without mirroring.
For panels containing horizontal color changes, record where bands should meet across joins. Label panel order and top edges. Different stitch patterns can have different row heights, so matching row numbers alone may not align the bands. Compare actual prepared lengths.
Reserve time and yarn for assembly
In the four-panel example, the three long seams total 3 × 120 = 360 cm. Use a representative join sample to estimate that yarn separately; our joining-yarn guide explains measuring consumption per seam length. The panel arrangement determines the seam length here, not a square-grid formula.
Keep body, joining and border reserves separate. Before making every panel, check the first pair together for width, length, seam feel and color alignment. Keep the approved sample and measurements on your project sheet so later panels have a clear reference.
Keep planning your blanket
Examples illustrate the arithmetic; they are not physical project tests. Send a correction.