Estimate fringe yarn by multiplying the number of bundles × cut strands per bundle × the length of each cut strand. Use the full cut length, including what folds back, goes into the knot and gets trimmed. Keep fringe separate from the yarn used to crochet the body or border.
Picture the finish before cutting
Would you like a few spaced accents or a fuller fringe? Try the body color for a quiet finish, or repeat one accent shade from the blanket. Lay a small trial beside the fabric to decide whether the length and fullness suit it. Our color palettes offer starting points, rather than exact yarn shade matches.
Use your pattern or a technique reference for attachment. Lion Brand’s fringe tutorial illustrates a loop-and-knot method and notes that fringes can use different numbers of strands. This guide budgets the yarn; it does not prescribe attachment stitches for your blanket.
Choose a cut length with a small trial
For a strand folded in half, 24 cm gives two 12 cm lengths before attachment and trimming. The finished fringe will be shorter once yarn goes into the knot. If you want a 10 cm finished fringe, test whether a 24 cm cut works with your yarn and chosen knot before cutting the whole batch. The figures here are illustrative inputs, not measurements from a tested project.
Count original cut pieces rather than the loose ends you see after folding. Three cut strands folded together produce six hanging ends, but the budget still uses three full cut lengths. Try the intended number together: fullness and the attachment method affect how the result looks.
Count attachment positions, including the ends
Suppose you choose attachment positions spanning 100 cm, at 5 cm intervals, with a bundle at each end. There are 100 ÷ 5 = 20 intervals and 21 positions. For two opposite edges, that makes 42 bundles. Use the actual span between your first and last attachment points, which may be inset from the blanket corners.
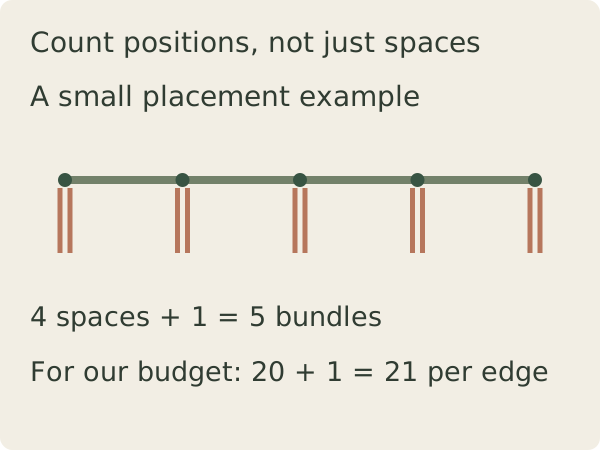
If your span does not divide evenly by your preferred spacing, choose a whole number of intervals and divide the span by that number to find the spacing. Then map those positions to suitable attachment points in your actual fabric. If you fringe all four edges, count any shared corner bundle once.
A two-edge yarn budget
| Input or result | Example |
|---|---|
| Bundles | 21 × 2 = 42 |
| Cut strands per bundle | 3 |
| Total cut strands | 42 × 3 = 126 |
| Cut length | 24 cm = 0.24 m |
| Base yarn | 126 × 0.24 = 30.24 m |
| With illustrative 10% allowance | 33.264 m, about 33.3 m |
The 10% is an adjustable cushion for cutting mistakes or extra pieces, not a universal requirement. Knot and trimming length are already included in each 24 cm cut, so do not add them again. Set aside extra trial yarn if it will not be reused in the final fringe.
If you have two colors in each bundle, count their strands separately. Two cream strands and one clay strand would allocate two-thirds of the base length to cream (20.16 m) and one-third to clay (10.08 m), before your allowance. Equal numbers of bundles do not imply equal yarn use by color.
Check your remaining yarn before making the cuts
With a label showing 200 m per 100 g, a 33.264 m reserve corresponds to about 16.6 g; rounding up gives a practical 17 g target for this example. Use your own label ratio and the remaining-yarn calculator to check a partial ball. Treat small weight readings as estimates and exclude the band or core.
Write the fringe reserve beside your border budget. Fringe also changes the outer reach of the blanket: 10 cm of finished fringe on both short ends extends a 120 cm body to roughly 140 cm end to end when laid straight. Note both body and fringe-inclusive dimensions in your project notes, then cut a small batch and check the appearance before committing the rest.
Use the calculator ↗Examples illustrate the arithmetic; they are not physical project tests. Send a correction.